Open post

New World Arcana Leveling Guide

Arcana is a part of the seven crafting-based trade skills. The grind is definitely worthwhile, but you need to have an appropriate plan prior to starting leveling up. You also have the option to choose from any of the seven professions, such as Jewel Crafting. As you level up, you will unlock various new things that will help you through your New World journey. In the following guide, we will be covering the most efficient ways to level up your Arcana Trade Skill.

Arcana Crafting centers around potions, magical weapons, ice gauntlets, etc., and these items are known to be profoundly useful in combat scenarios, as they offer an advantage over the opponent. Arcanists with higher levels always have powerful items on them and can craft anything with a high gear score.

You can perform the training at an Arcane Repository, which is located in settlements or territories. To reach a specific tier level, you need to take on Town Project, which allows you to craft an item, for this New World Arcana Leveling. Every weapon that can be crafted requires a tier-level that needs to be met at the Repository that you’ve chosen, or else, you need to look towards another settlement.

Required Materials

To train your Arcane skill, you need to use gathering resources like mining, skinning, harvesting, and fishing. It takes a while to gather the materials, and here’s what you will need – Oil, Tier 2 and Tier 3 Magical Plants, Fresh Water, Steel Ingots, Tangle Wisps, Water Motes, Coarse Leather, and Hyssop.

Related Skills

You can always opt for additional EXP for some of the skills that are related to Arcane Crafting. The two major elemental resources for Arcanists are Harvesting and Mining, and here are the skills that you can reply upon – Logging, Smelting, Harvesting, Mining, and Fishing for New World Arcana Leveling.

Power Levelling

There’s no appropriate way to level up trade skills in the game, but there are several methods that can be utilized to speed up the process. You can construct the method that is ideal for you, and approach the most effective one to increase our levels.

Levels 0 to 20 (Tier 2 Arcane Repository)

Start by crafting 57x Common Blight Tincture (Requirement: 57x Water, 57x Earthspine Stem, and 57x Shockbulb Stem). Followed by 26x Common Angry Earth Coating (Requirement: 26x Oil, 26x Shockbulb Stem, and 26x Tendrilspine Fibers).

Level 20 to 40 (Tier 2 Arcane Repository)

Start by crafting 30x Common Angry Earth Coating (Requirement: 30x Oil, 30x Shockbulb Stem, and 30x Tendrilspine Fibers). Followed by 109x Common Angry Earth Coating (Requirement: 109x Oil, 109x Shockbulb Stem, and 109x Tendrilspine Fibers), and 109 Common Blight Tincture (Requirement: 109x Water, 109x Earthspine Stem, and 109x Shockbulb Stem).

Levels 40 to 60 (Tier 2 & 3 Arcane Repository)

Start by crafting 109x Common Angry Earth Coating (Requirement: 109x Oil, 109x Shockbulb Stem, and 109x Tendrilspine Fibers). Followed by 109 Common Blight Tincture (Requirement: 109x Water, 109x Earthspine Stem, and 109x Shockbulb Stem), 34x Strong Blight Tincture (Requirement: 34x Water, 34x Fungal Spores, and 34x Shockbulb Stem), 34x Strong Corruption Tincture (Requirement: 34x Water, 34x Fungal Spores, and 34x Water Mote), 48x Strong Mana Potion (Requirement: 48x Water, 48x Crystalline Lodestone, and 48x Shockbulb Stem), and finally, Strong Blight Tincture (Requirement: 48x Water, 48x Fungal Spores, and 48x Shockbulb Stem).

Levels 60 to 80 (Tier 3 Arcane Repository)

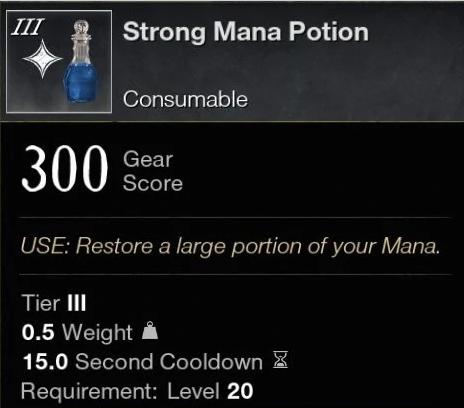
Start by crafting 62x Strong Mana Potion (Requirement: 62x Water, 62x Crystalline Lodestone, and 62x Shockbulb Stem), for this New World Arcana Guide. Followed by 62x Strong Beast Coating (Requirement: 62x Oil, 62x Fungal Slime, and 62x Shockbulb Stem), 267x Strong Mana Potion (Requirement: 267x Water, 267x Crystalline Lodestone, and 267x Shockbulb Stem), 267x Strong Beast Coating (Requirement: 267x Oil, 267x Fungal Slime, and 267x Shockbulb Stem), and finally, 267x Strong Angry Earth Coating (Requirement: 267x Strong Angry Earth Coating, 267x Fungal Slime, and 267x Tendrilspine Fibers) for this New World Crafting Guide.

Levels 80 to 120 (Tier 3 & 4 Arcane Repository)

Start by crafting 1036x Strong Mana Potion (Requirement: 1036x Water, 1036x Crystalline Lodestone, and 1036x Shockbulb Stem). Followed by 126x Powerful Blight Tincture (Requirement: 129x Water, 129x Cod Eye, and 129x Shockbulb Stem), 112x Powerful Fire Absorption Potion (Requirement: 112x Water, 112x Cod Eye, 112x Shockbulb Stem, and 112x Soulsprout), and finally, 112x Powerful Lost Ward Potion (Requirement: 112x Water, 112x Cod Eye, 112x Shockbulb Stem, and 112x Soulsprout).

Levels 120 to 160 (Tier 4 Arcane Repository)

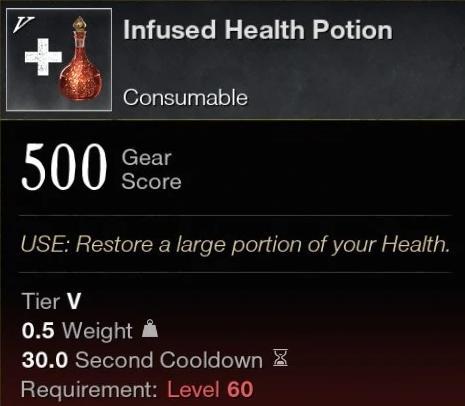
Start by crafting 996x Powerful Fire Absorption Potion (Requirement: 996x Water, 996x Cod Eye, 996x Shockbulb Stem, and 996x Soulsprout), for this New World Arcana Guide. Followed by 996x Powerful Lost Ward Potion (Requirement: 996x Water, 996x Cod Eye, 996x Shockbulb Stem, and 996x Soulsprout), 110x Infused Health Potion (Requirement: 110x Water, 110x Azoth Water, 110x Earth Mote, and 110x Soulsprout Stem), and finally, 135x Infused Mana Potion (Requirement: 135x Water, 135x Dragon Fish Jaw, 135x Shockbulb Stem, and 135x Soulsprout Stem) for this New World Arcana Crafting Guide.

Levels 160 to 200 (Tier 4 Arcane Repository)

Start by crafting 1050x Infused Mana Potion (Requirement: 1050x Water, 1050x Dragon Fish Jaw, 1050x Shockbulb Stem, and 1050x Soulsprout Stem). Followed by 162x Orichalcum Fire Staff (Requirement: 15552x Orichalcum Ore, 23328x Starmetal Ore, 93312x Iron Ore, 55242x Aged Wood, 13608x Sand Flux, and 972x Fire Mote).

Open post

RuneScape Raksha Guide

Ready for an exciting challenge that is not in the form of a minigame but a boss? Yes, we’re talking about Raksha. You need to first complete the Shadow Colossus mini-quest to gain access to Orthen Oubliette, where the boss is inhabited. You can easily overcome this challenge by following this guide. So, let’s start!

Requirements

Shadow Colossus is a members-only RS3 Quest that requires very little time to complete. It’s of Novice difficulty so you’ll be able to overcome the challenge without any trouble.

Besides that, there are no real requirements to complete the journey; however, having maxed combat skills would be an advantage during the final battle. We recommend 99 Attack, Strength, Defense, Magic, Ranged, and Invention, alongside 67 Summoning, 95 Prayer, and 95 Herblore (Overloads).

Walkthrough

The objective is to get access to Orthen Oubliette and defeat Raksha. You can start by speaking to Laniakea who is located southeast of Anachronia. After that, head west and climb up the stairs to siphon the anima pool until you reach 100%. You’ll be taking 200 HP every time so keep an eye out.

Next, head downstairs to unlock the doors near the pools. You’ll now be followed into a dungeon by Laniakea, who then promptly exits due to the anima’s toxicity. Head to the entrance of Oubliette and speak with Zaros.

After a couple of cutscenes, there will be a dialogue from The Keeper, followed by Raksha being disturbed by a shadow anima container. This indicates that the mini-quest is now completed.

Fight Strategy

Raksha looks similar to a Terex (Dinosaur). You can solo and duo fight the boss (according to your preference). You can only battle Raksha once the mini-quest is completed.

The objective is to subdue the beast after its long hibernation as it has now been interrupted because of the shadow anima container being removed.

Raksha starts with 800,000 HP if you solo approach, and it gets doubled in duo play. You need to watch out for the accurate attacks that it possesses. The boss is capped at 120 Magic, 110 Attack, and 110 Ranged, so the unprotected attacks can easily scale up to 5,000 damage.

Speaking of its Defense, the level is capped at 85. It may seem like Raksha has no weaknesses, but ranged is a good approach to consider. It’s also immune to stuns and poison attacks, but you can switch to leech and reflect damage as they come in handy.

Phase 1

During the first phase, Raksha will auto-approach you with tail and charged attacks. A few shadow bombs and shockwave attacks will fly in too if the phase continues for a longer duration. Try to end it as quickly as possible for your own benefit.

Phase 2

During the second phase, Raksha will start poisoning your mind with shadow energy. You’ll notice shadow orbs spawning around you, after which, you need to quickly expel them or you’re good as dead. Make sure you clear all the pools before proceeding ahead.

Phase 3

During the third phase, Raksha speeds up its anima absorption. After a message that anchors you to the shadows, Raksha will start summoning shadow manifestation in the area. These manifestations boast 10,000 HP at level 160, so deal with them as quickly as possible and put your focus back on the boss.
Next, the Keeper will ask you to head into the antechamber, resulting in the shadow manifestations disappearing, and the anima pools to stop increasing Raksha’s strength. He’ll now start to follow you and the Keeper will activate a shield to trap the boss.

Now, Raksha reverts its starting health of 400,000 (phase three). You need to stay close for him to abandon his special attacks. Stick around and try to avoid the tail attacks, as well as a new attack called Erebus Charge.

Rewards

You won’t be seeing any items on the floor after defeating Raksha because the Keeper teleports the items away to an antechamber. You can pick them up from where the security projector is located. You can check the drop table for the entire list of items.

Conclusion

We hope the guide was helpful to you while completing the quest, as well as facing off with the RuneScape Terex known as Raksha, the Shadow Colossus. You’ll surely get better with future attempts until there our guide is always here for you. Good luck!

If You Need More Runescape 3 Gold, OSRS Gold, And Other Runescape Service, RSOrder Will Be The Best Choice!

Open post

World of Warcraft Druids: Their Power, and Why They’re Always Second Best

World of Warcraft has many classes to choose from. Unfortunately, most classes specialize in their one particular skill, and you may not change your characters class. Fortunately, there is one class that doesn’t specialize in any particular skill, but is very good at all skills. This class is the original class of World of Warcraft: The Druid.

Druids are a shape-shifting class, using magic to shift into many various creatures. All forms do different things very well, while not as well as the class that specializes in it. The Druids forms consist of Bear, Cat, Cheetah, Tree of Life, Moonkin, Dire Bear, and Flight Form. While the number of forms may seem overwhelming, and while each has its specific use, one form is often used most of the time depending on what talent tree is chosen.

The first form, Bear Form, is acquired at level 10 and increases armor by 280% of your normal armor value. This gives you the ability to mitigate damage, making you a tank (when fighting with friends, the tank will attempt to force the monster being fought to attack him). To be able to keep the fiend attacking you, you are given many abilities that will force the monster to continue to attack you. Bear form does not deal very much damage and should only be used to mitigate damage. Dire Bear form is eventually attained and will increase armor contribution from items by 360%. This form is most similar to a Warrior.

The second form attained is Cat Form. This form gives you the ability to stealth (turn invisible). You may pounce you opponents gaining the upper hand from the start of the battle, while dealing mass amounts of damage. Unfortunately, there are no armor increases in this form. This form is most similar to a Rogue.

The third form is the cheetah form. This form is attained at level 30, and simply increases speed by 30%.

The next 2 forms are both attainable at level 50, but are talent tree specific, so you may only use 1 of them. If you are a tank (in the feral talent tree), you will not have access to either of these. The Moonkin is a giant owl beast, and specializes in casting nature magic. They are often referred to as Boomkin, because of their ability to do mass damage very quickly, and Oomkin, because of how fast they run out of mana. The Tree of Life in the restoration tree specializes in healing power and will increase the benefit of all healing magic cast to everyone in your party. It also increases mana regeneration. Tree of Life is different from most other healing classes, because it can only cast heal over time spells, referred to as HoT. This can be very useful during boss fights that can freeze everyone, as your heals will continue to heal while no other healer can cast magic.

The final form attained is Flight Form. This allows you to take flight anywhere in Outland, and eventually Northrend. Flying Speed is increased by 60%. There is also an Epic Flight Form attainable by spending five thousand gold and completing a quest. Epic Flight Form increases flight speed by 280%

While the druid does not specialize in any one particular skill, they have the ability to do just about anything great, but not the best. This is supported by the fact that the druid class (restoration talent tree) dominates every other class in player-vs-player combat.

Open post

The Ninja RPG: Knowing Your Bloodlines and How to Gain Access to Them

Anyone who knows anything about the Naruto anime knows that each clan in a village normally has a specific bloodline that makes them a unique breed of ninja, and the Ninja RPG carries this out by supplying certain ninja in the game with Bloodline Traits. These traits have a wide range of effects, and are rare, but those who have obtained a bloodline are blessed with incredible power. But no worries if you were born a normal mortal, you can always buy a bloodline late on in the black market.

Bloodlines are awarded to ninja who have reached Genin level and have chosen to “roll for a bloodline”. This option becomes available to a ninja when they reach level 1 Genin and graduate the Ninja Academy. You can choose when to roll for your bloodline, but it really does not matter when you do so because it does not increase or decrease your chance of gaining a bloodline, so it’s recommended to roll as soon as possible so if you are lucky enough to gain a bloodline then you start to reap the benefits quicker.

The bloodlines in the Ninja RPG have different effects but pretty much serve two purposes. There are Regen Bloodlines that increase the amount of Chakra and Stamina you recover over a 60 second period of time. The other Bloodlines unlock secret techniques that are only available to members of that Bloodline. Here is the list

Lesser Demon – User gains +10 Regen points

Evil Harpy – User gains +13 Regen points

Demon – User gains +15 Regen points

Banshee – User gains +18 Regen points

Evil Sand Demon – User gains +20 Regen points

Mythical Dragon – User gains +23 Regen points

Ancient Demon – User gains +25 Regen points

Fallen Angle – User gains +30 Regen points

Epic Demon – User gains +50 Regen points

The above are Bloodlines that add to a ninja’s Regen rate and allow them to recover their stat pools very quickly. Many are available for purchase in the Black Market by spending Reputation points, but the most powerful are reserved for those lucky enough to roll that bloodline. The following are Bloodlines that unlock special techniques

Blood Enchanted Eyes – User gains access to the following Genin and Chunin level jutsu: Mindtrick and Hypnotic Annihilation

Blue Blade Eyes – User gains access to the following Genin, Chunin, and Jonin level jutsu: River Shadow, Flash Step, Lightning Scythe.

Ancient Phoenix – User will gain +20 Regen points and access to 1 Genin and 1 Special Jonin level technique: Firebreath, Storm of the Dead

The following 4 Bloodlines were released during the summer of 2007 and are considered to be the most powerful when it comes to unlocking special techniques.

Phantom Reaper – This bloodline allows access to the following moves, each unlocked when the users ninja achieves a certain rank and each the strongest Weapon jutsu in that specific rank.

Genin: Phantom Earth, Chunin: Phantom Scythe, Jonin: Phantom Control, Special Jonin: Reaper Transformation.

Basilisk Demon – This bloodline will give the user access to the most powerful Genjutsu in the game for each rank.

Genin: Shadow Binding, Chunin: Idle Sight, Jonin: Breath of Doom, Special Jonin: Eyes of Fright.

Metallic Skin – This bloodline is allows the user to the most powerful Taijutsu in the game with accordance to that ninjas rank.

Genin: Enraged Fists, Chunin: Heavy Headbuttt, Jonin: Metallic Offense, Special Jonin: Silver Strike.

Legendary Nin – This bloodline allows the user to gain access to the most powerful jutsu of the highest rank. This means that any Special Jonin ninja with this bloodline would have access to the most powerful jutsu from around the Shinobi world. The following are the Special Jonin level techniques awarded with the Legendary Nin bloodline.

Infernal Gates, Dark Thunder Summon, Demonic Torture, Blade Tornado Attack.

Bloodlines are an important part of the Ninja RPG, just like in Naruto, so it is important to gain access to one as soon as possible. If you roll one, great, but if you are like most of us you’ll have to gain enough Reputation points to purchase one in the black market. Knowing the bloodlines is not only essential for you as a ninja because you need them to become stronger, but knowing an opponents bloodline will help in forming a strategy to defeat them.

Open post

Luna Online: Free MMORPG and Dating Sim

GPotato is best known for FLYFF – Fly For Fun. However, the free to play MMORPG portal features a variety of other games by various developers, ranging from the cute new Dragonica, to the amazing Rappelz. Gpotato even has a variety of amusing mini flash games on their site.

GPotato currently has another game in Closed Beta – Luna Online. The official Luna Online website features gorgeous anime-styled illustrations. However, not much information is available via the gPotato site. I tried to get into the closed beta, but the link did not work for me. If I become aware of any changes, I will update this article.

Luna Online appears at first to be a typical MMORPG. The classes and races don’t offer much variety, although the site boasts over 40 different jobs to choose from. The graphics are cute but simple and not overly impressive as far as I can see. Two aspects stand out about the game, though. The first is a farming system, which allows you to grow crops, pets, and even vehicles (although this statement makes me think of a car growing out of the ground, I doubt they meant it that literally).

The second is a match-making system. After poking around the website a little bit, I discovered that Luna Online is not just an MMORPG – it also doubles as a Dating Sims. When you create your character you choose a personality and interests for him or her. When someone enters the screen with similar interests, a “Heart Alarm” goes off to “show love at first sight.” Players can go on dates in game and enter date-only dungeons. If the date goes well, the players get rewards.

But it doesn’t end there. When a date goes well, the characters get a chance to marry. Once a marriage takes place, the players can “adopt” children to share the family name and become a nice little in-game family. What about same-sex marriage and dating? I am uncertain about that, though I believe that is a possibility for the future.

Luna Online has two faces – you can either go on for the pure monster-killing MMORPG fun, or you can go on to socialize. Go on a couple of dates and create a family. Perhaps this is a way to prepare for the future. Or a nudge from the all-knowing world of the internets to get away from that computer screen and go experience the real thing. Either way, this is one to check out.

Posts navigation

1 2 3 4 5 6 7 8
Scroll to top