Open post

ARC Raiders: Flashpoint Update Guide

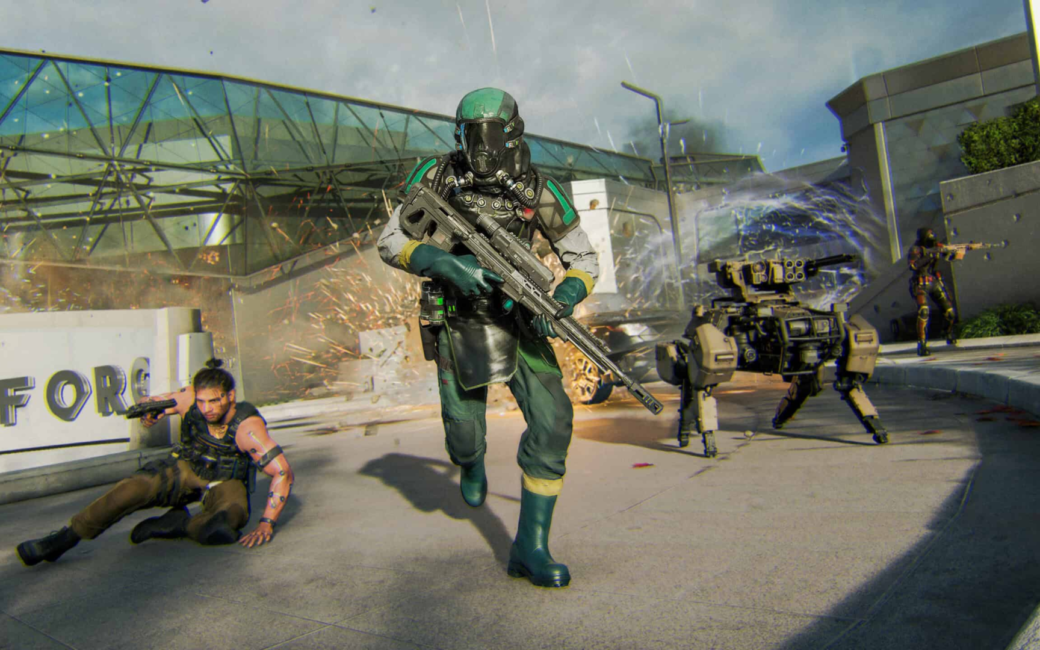
In this major update to Ark Raiders, the game has taken a dramatic turn, shaking up everything you thought you knew about the game. With new enemies, intense PvP action, powerful new weapons, and exciting updates to gameplay mechanics, Flashpoint breathes new life into the game. If you were feeling like Ark Raiders was starting to get a bit stale, this is your wake-up call. Here’s everything you need to know to survive (or dominate) in the Flashpoint update. And if you’re looking to get a head start, you can buy ARC Raiders Items to gear up and enhance your gameplay.

New Enemy: The Vaporizer

First up: the Vaporizer. Imagine a miniaturized flying Matriarch with a deadly laser that will set you on fire in an instant. It’s fast, has multiple shields, eight engines, and a ton of health. Taking one of these down is no easy feat, even with the Hole Cracker. They appear alongside smaller enemies like Hornets and Wasps, making this an intense experience. The Vaporizer is one of the toughest enemies in the game, so be prepared.

· Pro Tip: Seekers and other high-tier grenades seem to trigger the Vaporizers’ shields early, so you’ll need to plan your attack carefully. Weapons like the Equalizer are looking like they’ll be essential for these tough fights.

New Map Condition: Close Scrutiny

The map condition Close Scrutiny is absolutely insane. Here’s how it works:

· Ark Assessors will randomly drop into the map, bringing with them an insane amount of loot and danger. These platforms come with armed guards, and one of those guards could be the infamous Vaporizer.

· When you engage the Ark Assessors, multiple Vaporizers will show up to guard them. Imagine trying to handle several of these death machines, all while dealing with other players trying to kill you for the loot. It’s utter chaos, but in a thrilling way.

· Tip for Surviving: This is a great time to throw those Lure Grenades. If you need a breather from the chaos or want to throw enemies off your trail, these grenades can help you out.

PvP Is Now the Main Event

The Flashpoint update has massively increased the PvP potential in Ark Raiders. While previous updates focused on PvE content, Flashpoint has encouraged players to compete for the loot. Players are now far more emboldened, and you’ll find yourself constantly getting third-partied in every firefight.

· Tip: Don’t assume that all players will cooperate with you in fights against Vaporizers. You might find that some players will try to take you out right after teaming up for a common enemy. Trust no one—unless you’re in a group of your own.

· Solo or Group Play? While Ark Raiders still retains its jolly cooperation, solo play feels a lot more dangerous, and you’ll probably find it’s a lot more rewarding to team up with others. However, expect betrayals and chaotic firefights over the precious loot.

Crafting and Quality of Life Tweaks

Flashpoint also brings some much-needed quality of life changes:

· Crafting Improvements: The game will now suggest alternative material sources when crafting. If you run out of one material, it will suggest another one that can be recycled. This saves you from the headache of inventory management and makes crafting smoother overall.

· Loot Scaling: Loot in locked rooms now scales based on the rarity of the key you use. Better keys mean better loot, so make sure to prioritize grabbing rarer keys.

· Server Tweaks: Players with custom loadouts are now more likely to join fresh servers, meaning those high-tier gear hunters won’t be snagging all the good loot right away.

New Weapons: Dabra & KTO

The Flashpoint update also introduces two new weapons that are getting a lot of attention:

1. Dabra (Energy Shotgun) – This legendary weapon is as terrifying as it sounds. It’s fast, powerful, and has a high rate of fire, making it a game-changer in close combat.

o How to Get It: The Dabra blueprint has a low chance of dropping from Ark Assessors.

2. KTO (Medium Ammo SMG) – A rare, powerful SMG that’s perfect for fast-paced skirmishes.

o How to Get It: The KTO blueprint can be found in Hurricane Caches.

Future of Ark Raiders: Ribbon Tides

Looking ahead, Ark Raiders is not slowing down. The next big update, Ribbon Tides, is set to bring a new map: a massive city complex surrounded by a decaying sea barrier. Bridges will connect the city, creating intense firefights on narrow crossings. This could open up some truly unique gameplay moments reminiscent of classic battle royales.

Wrap-Up: Flashpoint is a Game-Changer

The Flashpoint update has completely revamped the gameplay in Ark Raiders. With new enemies like the Vaporizer, more PvP action, and exciting quality of life tweaks, it’s a must-play for returning players. The addition of intense firefights and loot-laden battles adds a whole new level of excitement.

Final Tip: Whether you’re teaming up to take on the Vaporizers or engaging in all-out PvP brawls, don’t forget to focus on getting those high-tier weapons and gear. It might just make the difference in surviving the intense firefights ahead.

Keep an Eye Out for the Next Update

The Ribbon Tides update is right around the corner, so stay tuned for even more gameplay changes. And, as always, keep your eyes peeled for those epic loot drops! If you’re looking to get a head start, check out ARCR Items for sale on MMOEXP to get the best gear and enhance your gameplay. Let me know in the comments what you think about the new update or share any strategies you’ve developed for taking on the Vaporizers. Good luck, and stay safe out there, Raiders!

Diablo 4: When Do You Get Your Mount

Sanctuary, the dark and vast world of Diablo 4, is filled with treacherous landscapes, hordes of demons, and endless exploration. Traversing its sprawling zones on foot can quickly become tedious-especially as you venture further from waypoints and tackle late-game content. That’s where mounts come in: these trusty steeds are a game-changer, boosting your movement speed and making exploration far more efficient. But when exactly do you unlock your first mount in Diablo 4? This guide breaks down the timeline, requirements, and everything else you need to know to get your mount as quickly as possible. This will make it easier for you to obtain Diablo 4 Items, gold, and other rewards in the game.

The Short Answer: When You Unlock Act 4

The first mount in Diablo 4 becomes available once you progress through the main campaign and reach Act 4. Unlike some games where mounts unlock at a fixed level, Diablo 4 ties mount access to your story progression-though level and story milestones often align closely.

On average, most players unlock their mount around level 35-40. This timing lines up with completing the first three acts of the main story, which is the key prerequisite for accessing the mount quest. However, the exact level can vary slightly depending on how many side quests you complete along the way.

Importantly, mounts are account-wide. Once you unlock your first mount on one character, every current and future character on your account will have access to mounts immediately-no need to repeat the quest for alts.

Prerequisite: Complete Acts 1-3 of the Main Campaign

To unlock your mount, you must first finish the first three acts of Diablo 4’s main story. These acts take you through the Fractured Peaks, Scosglen, and Dry Steppes regions, introducing you to key characters and setting the stage for Act 4.

Act 1 focuses on the Fractured Peaks and your hunt for Lilith, while Act 2 sends you to Scosglen to aid the Druids. Act 3 takes you to the Dry Steppes, where you’ll confront the Cult of the Triune and uncover more of Sanctuary’s dark secrets.

You don’t need to complete every side quest or explore every corner of these regions-just the main story objectives. Skipping unnecessary side content will help you reach Act 4 faster and unlock your mount sooner.

The Mount Quest: “Mount: Donan’s Favor”

Once you finish Acts 1-3, you’ll be summoned back to Kyovashad, the capital city of the Fractured Peaks. Here, you’ll meet Donan, a key character in the main story, who will give you the quest “Mount: Donan’s Favor”.

This quest is short and straightforward. Donan will explain that he’s granting you access to the stables, as a reward for your efforts in the first three acts. Your only task is to visit Oskar, the Stable Master in Kyovashad.

Head to the stables (marked by a horse icon on your map) and speak to Oskar. He will formally unlock your mount, giving you a generic brown horse to use. This completes the quest and grants you permanent access to riding mounts.

Skip the Campaign? Unlock via Level 36

If you choose to skip the main campaign (a feature available for players who have already completed it on another character), you won’t need to progress through Acts 1-3. Instead, you can unlock your mount by reaching level 36.

At level 36, the “Mount: Donan’s Favor” quest will automatically become available, even if you skipped the story. Simply complete the quest by talking to the Stable Master, and you’ll get your mount immediately.

This is a great option for alt characters or players who want to jump straight into endgame content without replaying the campaign. It ensures you still get the convenience of a mount without the story grind.

What Your Mount Does (and Doesn’t Do)

Your mount’s primary purpose is to boost your movement speed, drastically reducing the time it takes to travel between waypoints, dungeons, and world events. Mounting up is instant, and you can even mount in combat (unless you’ve been recently hit by a PvP opponent).

Each mount also has a unique dismount ability, which varies by class. This ability lets you leap off your mount and deal damage to nearby enemies, adding a strategic element to combat engagements.

Notably, mounts cannot be used inside dungeons, cellars, or other instanced areas. They’re strictly for open-world travel, so you’ll still need to explore dungeons on foot.

Customizing Your Mount: Bardings and Trophies

Once you unlock your mount, you can customize its appearance using bardings and trophies-cosmetic items that add style without affecting performance. Bardings are essentially armor for your mount, changing its look with different styles and colors.

Trophies are decorative items that showcase your in-game achievements. For example, the “Cry of Ashava” trophy is awarded for defeating the Ashava world boss during special events. These can be affixed to your mount’s saddle or flank.

Bardings and trophies can be earned through exploration, world events, quest rewards, or purchased from vendors and the in-game shop. Some rare mounts and cosmetics are also available via the battle pass or limited-time promotions.

Tips to Unlock Your Mount Faster

If you’re eager to get your mount as soon as possible, focus solely on the main story quests. Side quests are fun and rewarding, but they will slow down your progress through Acts 1-3.

Use waypoints to fast-travel whenever possible. This cuts down on unnecessary walking time between story objectives, helping you reach Act 4 quicker.

For players skipping the campaign, focus on leveling efficiently. Complete nightmare dungeons, world events, and Helltides to gain XP quickly and hit level 36 faster.

Other Mounts: Beyond the Starter Horse

The generic brown horse is just the beginning. Diablo 4 has over 20 unique mounts to collect, each obtained through different methods. Some are dropped by powerful bosses like Uber Duriel, while others are rewards for completing challenges or purchasing them from the in-game shop. Therefore, purchasing cheap D4 Gold in advance is an excellent choice.

Seasonal mounts are also available during each Diablo 4 season. These are often tied to seasonal themes and can only be collected during that season, making them rare and sought-after by collectors.

The “Bloody Mount” is a rare drop from the Echo of Lilith, while the “Smoldering Brimstone Steed” can be obtained from Uber bosses. These mounts are not necessary for gameplay but add a unique flair to your character.

In conclusion, your first mount in Diablo 4 unlocks after completing Acts 1-3 of the main campaign (around level 35-40) or by reaching level 36 if you skip the campaign. It’s a crucial tool for exploring Sanctuary, saving you time and making late-game content more accessible. Once unlocked, you can customize your mount with cosmetics and even collect rare variants to stand out. With this guide, you’ll know exactly when to expect your mount-and how to get it as quickly as possible.

Open post

ARC Raiders Firefly Guide: How to Find, Defeat, and Farm Firefly Burners

The world of ARC Raiders is filled with deadly robotic enemies, each designed to challenge Raiders in different ways. Among the newest and most dangerous airborne threats is the Firefly, a highly aggressive ARC unit capable of overwhelming players with relentless fire attacks.

Unlike ground-based enemies such as Ticks or heavy units like Matriarchs, Fireflies dominate the battlefield from above. Their close-range flame attacks and heavy armor make them one of the most dangerous robotic enemies you’ll encounter during a run.

However, defeating Fireflies is well worth the effort. They drop valuable materials, especially Firefly Burners, a key component used to craft powerful explosives and advanced ARC Raiders Items.

This guide explains where to find Fireflies, how to defeat them efficiently, and how to farm their valuable drops to strengthen your arsenal.

What Are Fireflies in ARC Raiders?

Fireflies are aggressive flying ARC units that appear across multiple maps in ARC Raiders. While they technically spawn everywhere, they appear far more frequently in two key areas:

·Spaceport

·The Blue Gate

If your goal is to farm Firefly Burners quickly, these maps provide the highest encounter rates and the most reliable farming routes.

Fireflies usually travel alone but can sometimes appear alongside other aerial ARC units such as Wasps or Hornets. Fortunately, they are relatively easy to identify.

You can recognize a Firefly by:

·A longer, flatter body shape

·A louder engine sound compared to other drones

·Aggressive close-range flight behavior

Unlike Hornets that hover at a distance, Fireflies aggressively pursue Raiders and attempt to attack from close range.

Why Fireflies Are So Dangerous

Fireflies rely on a flamethrower-style weapon system that deals continuous damage to both shields and health. This attack has several dangerous characteristics:

·Damages health and shields simultaneously

·Burns through health slightly faster than shields

·Applies a burn effect that continues dealing damage over time

This makes Fireflies particularly deadly in tight environments such as corridors, staircases, or enclosed rooms. If you get trapped without cover, they can quickly eliminate you, especially if other ARC enemies or rival Raiders are nearby.

To make matters worse, Fireflies are tougher than many other flying units. Their reinforced armor means weaker weapons struggle to deal significant damage.

Best Weapons for Destroying Fireflies

To defeat Fireflies consistently, you’ll want weapons that offer Medium ARC Penetration or higher.

One excellent option is the Anvil, a dependable weapon that can be purchased from Tian Wen’s shop relatively early in your progression. Its combination of penetration and sustained firepower makes it effective against airborne threats.

When engaging Fireflies, focus on the following strategy:

·Aim for the front engines

·Damaging engines disrupts their flight control

·This forces them to fly lower or lose stability

·Use this moment to reposition or finish them off

Targeting weak points dramatically shortens the fight and prevents them from maintaining their dangerous flame attack.

Best Explosives for Firefly Encounters

Grenades are extremely effective against Fireflies because of their combat behavior.

Unlike Hornets, Fireflies stay relatively close to their target and don’t move erratically, making them easier to hit with explosives.

Two of the most effective grenade types include:

·Seeker Grenades – Automatically track ARC enemies

·Trigger Grenades – Allow precise manual detonation

Well-timed explosives can destroy a Firefly quickly, breaking through its armor before it can deal sustained damage.

Using explosives alongside strong firearms is one of the most reliable ways to farm valuable ARC Raiders Items from these enemies.

Important Safety Warning: Firefly Crash Zones

Defeating a Firefly doesn’t end the danger immediately.

When destroyed, Fireflies explode and leave behind a burning fire zone on the ground. This lingering hazard behaves similarly to a Fireball effect and can damage players who step into it.

Be cautious when:

·Fighting multiple ARC enemies at once

·Moving into loot a destroyed Firefly

·Engaging in close-range combat

Even experienced players can be caught off guard by residual fire damage.

Firefly Drops: What Loot You Can Expect

Each Firefly guarantees several valuable drops. The most important item is the Firefly Burner, which is required for crafting powerful explosives.

Guaranteed drops include:

·1 Firefly Burner

·1 Simple Gun Parts

·5 Chemicals

·1 Arc Powercell

Occasionally, you may also receive bonus loot such as:

·Crude Explosives

·Explosive Compound

Because Fireflies reliably drop Burners, they are one of the most consistent targets for players looking to expand their supply of crafting materials.

How to Use Firefly Burners

The primary use of Firefly Burners is crafting the Trailblazer Grenade, a powerful explosive that offers strong crowd control and area denial.

Trailblazer crafting requirements include:

·1 Synthesized Fuel

·2 Crude Explosives

·1 Firefly Burner

However, crafting this grenade requires additional progression milestones:

·Explosives Station Level 3 unlocked

·Trailblazer Blueprint obtained

Once unlocked, Trailblazer grenades become one of the most useful ARC Raiders Items for both PvE and PvP encounters.

Blueprint Strategy and Crafting Optimization

Blueprint progression plays a huge role in maximizing the value of materials you collect.

Some players prefer farming high-level maps repeatedly to find rare blueprints, while others choose to buy ARC Raiders Blueprints through external marketplaces to accelerate their progression.

Unlocking explosive crafting recipes early allows you to fully utilize Firefly Burners and other rare materials obtained from combat.

Combining strong weapons with explosive tools creates a versatile loadout capable of handling both airborne and ground-based ARC threats.

Best Maps for Farming Fireflies

Spaceport

Spaceport is one of the most popular Firefly farming locations due to its high ARC activity.

Advantages include:

·High Firefly spawn rates

·Dense loot areas

·Frequent ARC encounters

However, Spaceport also attracts experienced Raiders farming high-value ARC Raiders Items, so expect frequent PvP encounters.

The Blue Gate

The Blue Gate offers a slightly different farming experience.

Key features include:

·Higher-tier enemy spawns

·Greater overall difficulty

·Open terrain that improves aerial visibility

Fireflies are easier to spot in the open spaces here, but combat can be riskier due to limited cover.

Farming Tips for Maximum Efficiency

To maximize your Firefly farming runs, follow these tips:

1. Bring Medium ARC Penetration weapons.

2. Carry at least one Seeker or Trigger grenade.

3. Fight in open areas when possible.

4. Eliminate other ARC threats before engaging Fireflies.

5. Avoid rushing into burning crash zones.

If your goal is to farm Burners quickly, prioritize mobility and efficient extraction routes.

Final Thoughts

Fireflies are among the most aggressive airborne enemies in ARC Raiders, but they also provide one of the most consistent sources of crafting materials.

Open post

Tips on Overcoming the Latest ARC Enemies in ARC Raiders

In ARC Raiders, two formidable new enemies have emerged:the Firefly and the Comet. These machines are changing the combat landscape, introducing a need for agility, strategic positioning, and precise aim, differing greatly from earlier ARC units that favored conventional cover strategies.

The Firefly stands apart from traditional flying ARCs like Wasps and Hornets. Rather than hovering at safe distances, this unit closes in aggressively with remarkable accuracy, forcing players out of cover and punishing any sign of panic.Unlock your full potential in ARC Raiders with premium ARC Raiders Items delivered fast and securely from MMOexp.

Why the Firefly Is a Force to Be Reckoned With

Persistent Tracking:The Firefly relentlessly follows Raiders.

Flame Attacks:Its sustained firepower can overwhelm.

Punishes Open Movement:It thrives on players who flee in open areas.

Corner Pressure:It excels in forcing players out from behind cover.

If you rely on tactics that work against other airborne ARCs, you’ll find yourself in danger quickly.

Counter Strategies for the Firefly

1.Utilize a Photoelectric Cloak

This device temporarily disrupts the Firefly’s targeting, making you invisible. In high-pressure situations with low health, cloaking can be a safer option than trying to outgun it.

2.Target the Yellow Gas Tank

The Firefly’s flamethrower is powered by an exposed fuel tank, identifiable by its yellow color.

Tips:

Wait for it to hover before attempting a shot.

Use precision weapons for concentrated bursts.

Accuracy is vital; avoid wild firing.

3.Avoid Open Areas – Seek Shelter

Running in open terrain is detrimental because:

Fireflies dive aggressively on fleeing players.

They exploit open sightlines.

Instead, move indoors to limit their maneuverability, allowing for better targeting.

4.Delegate Lure Grenades Wisely

If overwhelmed, a Lure Grenade redirects the Firefly’s focus.

Best used when:

Engaging multiple ARCs.

Reviving teammates.

During extraction missions.

Keep in mind that it merely buys time, not a permanent solution.

The Comet:A Direct Assault

In stark contrast to the tactical Firefly, the Comet embodies raw power. This armored explosive unit charges at players, resulting in catastrophic damage upon self-detonation.

Why the Comet Is a Deadly Opponent

Large Explosive Radius:Its destruction can take out players in close proximity.

Heavy Armor:Its durability is a significant challenge.

Intelligent Targeting:The Comet prioritizes squad members.

Destructive Mechanic:It does not wear you down gradually; it delivers one massive blow.

Survival Tactics Against the Comet

1.Engage From a Distance

Shooting the Comet from afar causes it to open up, exposing its weak spot.

Best to:

Attack from mid to long-range.

Wait for it to expose its core for optimal damage.

2.Opt for High-Fire-Rate Weapons

While heavy-hitting weapons may seem tempting, a higher rate of fire is more effective against the Comet’s rapid movements.

3.Maintain Distance While in a Squad

The Comet aims to inflict maximum damage on clustered players.

Instead, spread out and form a loose perimeter, which allows for easier revives in case of damage.

4.Target the Side Armor

The Comet has the thickest armor in the front, so focus on its sides.
Strategies include:

Circle-strategizing.

Coordinating with teammates to attack from different angles.

5.Stay Calm During a Charge

If the Comet charges at you, staying composed is crucial.

Advanced tactic:

Stand your ground briefly.

Aim for its front weak point during the charge.

Dodge just before impact.

Loadout and Strategy for High-Stakes Encounters

With the introduction of the Firefly and Comet, adaptability in your build is essential. Consider equipping:

Precision Weapons:Ideal for targeting weak points.

Automatic Firearms:Useful during windows of vulnerability.

Utility Items:Photoelectric cloaks and lure grenades can turn the tide.

Balanced Ammunition:Prepare for intense firefights.

When engaging in high-risk zones, guard your most valuable items fiercely. Losing upgraded gear to a Comet’s blast can be more devastating than losing basic equipment.

For those tackling endgame challenges, focusing on optimized builds or acquiring buy ARC Raiders BluePrints can greatly enhance your chances of survival and success. Master these strategies to not just survive, but to thrive in the treacherous landscape of the surface.

Open post

A Complete Guide to Beating the Serum Puzzle in BO7 Zombies

Collecting and completing all six Serum parts in Ashes of the Damned is one of the most complex sections of the Call of Duty:Black Ops 7 Zombies main easter egg. Between multi-step item requirements, time-gated enemies, and a final chemistry puzzle, this process can feel overwhelming-especially for players attempting the quest solo or for the first time.

All Serum Parts Locations in Ashes of the Damned

Serum Part 1 – Powder of the Forgotten

This part requires two key items:Wisp Tea and the Necrofluid Gauntlet.

First, acquire Wisp Tea either directly from Zarya Cosmodrome or for free by completing the Twins easter egg at Vandorn Farm. With Wisp Tea active, head to the Tailor Shop in eastern Ashwood, just right of Vulture Aid. Inside is a mirror that reacts to Wisp Tea. Simply stand near it while Wisp Tea is active to shatter it.

Next, obtain the Necrofluid Gauntlet. Once you have it, return to the broken mirror and shoot it. The Powder of the Forgotten will drop to the floor.

Serum Part 2 – Widow’s Lantern

Travel to Blackwater Lake and enter the cabin. Go downstairs into the kitchen and inspect the sink cabinet on the south wall to collect the Jar of Spores.

Bring the jar to Vandorn Farm, just outside the main gate, where you’ll find a dead horse covered in mushrooms. Interact with it to plant the spores. After waiting three full rounds, the spores will mature, allowing you to collect the Widow’s Lantern.

Serum Part 3 – Mysterious Limb

This is a time-gated drop tied to Zursa, the zombie bear Elite, which spawns from Round 16 onward.

To obtain this part, you must kill Zursa using Ol’ Tessie’s Abomination Head Beam Attack. First, unlock the Abomination Head upgrade from Reba Diner at Exit 115 by killing the Cook zombie, retrieving the Freezer Key, and upgrading Ol’ Tessie in Ashwood.

Weaken Zursa with normal weapons, then finish her off with the Beam Attack. She will explode and drop the Mysterious Limb.

Serum Part 4 – Ravager Eyes

Ravagers are fast, four-legged enemies that spawn randomly or during Max Ammo rounds. Once one appears, lure it to a Saw Blade trap, such as the one outside the Barn at Vandorn Farm.

Activate the trap for 2,000 Essence and let it kill the Ravager. It will drop the Ravager Eyes automatically.

Serum Part 5 – Hoard Husk Chunks

This part also requires the Abomination Head upgrade for Ol’ Tessie.

Once upgraded, drive Ol’ Tessie along the interconnecting roads and look for a purple-glowing plant. These spawn randomly. When you find one, use the Beam Attack to destroy it. The Hoard Husk Chunks will drop-just be cautious when exiting Ol’ Tessie, as zombies here are extremely aggressive.

Serum Part 6 – Human Bones

Head to the Barn at Vandorn Farm. You’ll need a Combat Axe and a Molotov, both of which can be obtained for free. A Combat Axe is found in Reba Diner kitchen, and Molotovs can be crafted in the Barn or found near Ol’ Tessie garage.

Throw the Combat Axe at the right foot of the hanging corpse in the center of the Barn. Once the foot falls, throw a Molotov at it. After the fire burns out, you can pick up the Human Bones.

How to Solve the Serum Puzzle in Ashes of the Damned

With all six Serum parts collected, travel to Yuri’s Lab, located southwest of Zarya Cosmodrome. Inside, you’ll see six bowls containing your collected parts and a chemistry station in the center.

Start by interacting with the Powder of the Forgotten (the fifth bowl). Smoke will fill the room, and once it clears, three Pigpen cipher symbols will appear on the chalkboard. These symbols represent the order of bowls you must activate-top symbol first, then middle, then bottom.

Here is the translation, so you don’t need to decode anything yourself:

= Human Bones (1st bowl)

L = Hoard Husk Chunks (2nd bowl)

C = Widow Lantern (3rd bowl)

C. = Ravager Eyes (4th bowl)

L. = Mysterious Limb (6th bowl)

Interact with the correct three bowls in the correct sequence. If done properly, the vials will emit red smoke. Interact with the central vial to trade blood and begin the lockdown sequence.

During this lockdown, your health will not regenerate. To heal, you must use the Necrofluid Gauntlet siphon mechanic by firing and reloading to drain health from zombies. Survive the lockdown, and the Serum puzzle will be completed.

Practicing this entire sequence in Call of Duty Black Ops 7 Bot Lobbies is highly recommended, especially for solo players. Some players even choose to buy Black Ops 7 Bot Lobbies to safely rehearse complex easter egg steps like this without the pressure of public matches.

The Serum puzzle is intimidating at first, but once broken down, it becomes one of the most consistent steps in Ashes of the Damned.

Posts navigation

1 2 3 4 5 19 20 21
Scroll to top