
Open post

Throne and Liberty: How Do You Unlock Saurodoma Island?

Throne and Liberty, the latest addition to the world of MMORPGs, offers a vast and immersive world that rewards exploration and adventure. One of the most exciting and mysterious areas in the game is Saurodoma Island, a location that promises rare loot, unique enemies, and a wealth of lore. However, unlocking Saurodoma Island is not as simple as just walking to it. It requires players to fulfill certain prerequisites, complete quests, and possibly face off against challenging opponents.

In this guide, we’ll cover everything you need to know about Saurodoma Island, including the steps required to unlock it, the benefits of exploring the island, and some useful tips for players looking to make the most of their adventure in this unique locale.

What Is Saurodoma Island?

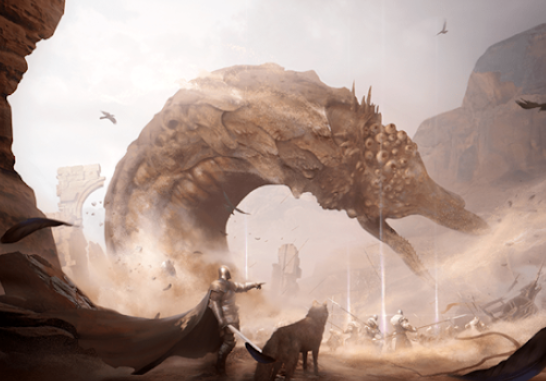
Saurodoma Island is a hidden and mysterious area in Throne and Liberty Lucent, known for its dangerous environments and high-level rewards. Situated in a distant part of the game world, the island features both PvE (Player versus Environment) and PvP (Player versus Player) elements, offering players the chance to fight against powerful monsters, discover unique resources, and encounter some of the game’s most challenging content.

The island is shrouded in mystery, and unlocking it is part of a larger narrative and progression system. It’s designed for higher-level players, offering endgame content that requires strategy, cooperation, and high-level gear to fully conquer. Whether you’re seeking to increase your power, unravel the island’s secrets, or engage in thrilling battles, Saurodoma Island is a must-visit location for serious adventurers in Throne and Liberty.

How to Unlock Saurodoma Island

Unlocking Saurodoma Island is no easy feat. It involves a series of steps and prerequisites that players must complete in order to gain access to the island. The process combines questing, exploration, and often a high degree of combat readiness. Here are the main steps required to unlock Saurodoma Island:

1. Progress Through the Main Story and Reach a Certain Level

Before you can even think about unlocking Saurodoma Island, you need to advance sufficiently in the main story of Throne and Liberty. While the island is not immediately available to players, reaching a certain level and progressing far enough in the game’s narrative will open up the questline that leads to its discovery.

Level Requirement: Players must typically reach a minimum level requirement, which can vary depending on the specific content being released or patches to the game. As a general guideline, this is often around level 40 to 50 for most endgame content, but checking current level recommendations in forums or official guides will give you a more accurate number.

Story Progression: The game’s main story will guide you through different regions and quests. As you progress, you will uncover clues about the island and eventually receive a quest that unlocks access to Saurodoma Island. This ensures that only those who have invested time in the core game will be able to access the more challenging and rewarding content on the island.

2. Completing the Questline for Saurodoma Island

After reaching the appropriate level and progressing through the story, players will be introduced to a series of quests that serve as the gateway to Saurodoma Island. These quests will typically involve:

Locating the Island’s Entrance: The island is hidden away and must be found by completing specific quests. These quests often send you to new NPCs, geographical locations, or specific dungeons within the game world.

Defeating Pre-Requisite Bosses: In some cases, certain boss fights or world events may be required to progress the story and unlock the island. These encounters could be against powerful foes guarding information related to the island or a final puzzle that needs solving to open the gateway.

Collecting Items: Some quests will require players to gather specific resources, artifacts, or ingredients. These could be tied to the island’s lore or serve as materials for rituals needed to unlock the island.

The questline is often multi-step and can take time to complete, but it’s necessary for progressing into the island’s core content.

3. Unlocking the Saurodoma Island Portal

Once you’ve completed the necessary quests and met the prerequisites, the game will grant you access to the Saurodoma Island Portal. This portal is typically located in a remote or hard-to-reach area, often far from the starting zones of the game, and may require some navigation skills to reach.

Portal Location: The portal to Saurodoma Island is often found in a special area or hidden zone within Throne and Liberty. It could be on a mountain peak, in the depths of a dungeon, or through a rare environmental phenomenon like a storm or natural rift.

Portal Activation: To activate the portal, players must interact with a specific item or mechanism—whether it’s a stone tablet, a ceremonial object, or some form of ancient relic related to the island. These activation steps are often part of the final quest or narrative that leads to the island’s unlock.

Traveling to Saurodoma Island: Once activated, the portal will open, allowing players to step through and travel to Saurodoma Island. It is important to note that this may not be a one-way portal; some game versions allow for return travel, while others restrict access until further steps are taken.

4. Be Prepared for the Challenges of Saurodoma Island

Saurodoma Island is not a casual destination. Players must come prepared to face tough challenges, both in terms of combat and environmental obstacles. The island is designed for high-level players, and its contents reflect that.

High-Level Enemies:

Boss Fights: Saurodoma Island is home to powerful bosses and rare monsters that require well-prepared parties to defeat. These bosses often have unique mechanics that force players to strategize carefully. Whether it’s multiple phases in a fight, environmental hazards, or limited time windows, these bosses are a true test of your skill.

PvP Zones: Some parts of Saurodoma Island may feature PvP zones where players can engage in battles against each other. Be prepared for encounters with other players looking to dominate the island’s lucrative rewards.

Rare Resources:

Crafting Materials: The island offers access to unique resources that can be used to craft high-tier items. These materials are essential for upgrading gear or obtaining powerful items that are exclusive to the island.

Legendary Gear: Saurodoma Island is also known for offering rare and powerful loot, including legendary gear, cosmetic items, and other exclusive rewards that can be used to improve your character or enhance your in-game experience.

5. Tips for Surviving on Saurodoma Island

Given the island’s difficulty, here are some essential tips for surviving and thriving on Saurodoma Island:

Group Up: Consider bringing a team of players with you to tackle the island’s more difficult areas. The bosses and enemies on Saurodoma Island are designed for groups, so coordinating with other players can help you overcome the challenges more effectively.

Gear Up: Make sure your gear is up to the task. Upgrading your equipment before venturing into Saurodoma Island is critical. If you don’t have the best available gear, consider farming the area’s prior content or using the auction house to get better items.

Prepare for PvP: If you plan on exploring the PvP zones, make sure you are prepared for player-versus-player combat. Other players will be competing for the same resources and loot, so you may encounter hostile players while traversing the island. Equip yourself with defensive abilities and strategies for PvP combat.

Research Boss Mechanics: Boss fights on Saurodoma Island can be complex and difficult, so make sure to research the mechanics of these fights ahead of time. Knowing what to expect will give you a significant edge in battle.

Join a Guild: Many of the island’s secrets and best rewards are best experienced with a guild. Guilds often have organized raids, strategic resources, and active members who can help you unlock Saurodoma Island and explore its contents.

Conclusion

Unlocking Saurodoma Island in throne and liberty lucent price is a challenging but rewarding experience. With its unique bosses, rare loot, and dangerous enemies, the island provides a high-level content zone that’s perfect for advanced players looking to test their skills and acquire powerful items. To gain access, you’ll need to progress through the game’s story, complete specific quests, and navigate a series of obstacles before you can step through the portal.

Make sure to prepare adequately, form alliances with other players, and be ready for an intense adventure. Saurodoma Island is one of the most thrilling and rewarding locations in Throne and Liberty, so take your time, gather your resources, and get ready for an unforgettable journey into the unknown.

College Football 25: How Recruiting Pipelines Work?

Recruiting Pipelines in College Football 25 is very important and determines how competitive your team will be in the years to come. This guide below will give you a detailed overview of Recruiting Pipelines in CFB 25 and strategies for effective recruiting.

What Are Recruiting Pipelines?

Recruiting pipelines refer to the connections and relationships a college football program has with high schools in specific regions. These pipelines can significantly impact a program’s ability to recruit players from those areas. The more players you recruit from a specific region, the stronger your pipeline becomes, leading to CFB 25 Coins better player interest and higher-quality recruits from that area in the future. Each college has a set number of pipelines, ranked from zero to five, each marked with different colors. These are color coded in the game. One refers to the lowest score you can have for a pipeline, and five represents the highest score.

Tier 5: Pink (the best)
Tier 4: Blue
Tier 3: Gold
Tier 2: Silver
Tier1: Bronze

What are the benefits of a strong Recruiting Pipeline?

Having a strong recruiting pipeline in Dynasty College Football provides several key advantages:

1. Increased Player Interest

Players from regions where you have a strong recruiting pipeline are more likely to show interest in your program. This makes it easier to attract top talent from those areas, as they are already familiar with and favorable towards your team.

2. Higher Quality Recruits

A well-established pipeline often results in higher-caliber athletes considering your school. As your pipeline strengthens, you’ll notice an uptick in the quality of recruits from that region, giving you access to  buy College Football 25 Coins more skilled and potentially game-changing players.

3. Easier Recruiting Process

With a strong pipeline, the recruiting process becomes more efficient. Players in these regions are not only more interested in your program but also easier to persuade to commit, allowing you to focus your recruiting efforts on other areas or needs within your team.

4. Long-term Program Stability

Consistent recruitment from strong pipelines ensures a steady flow of talent, helping you maintain a competitive team year after year. This continuity is essential for building a dynasty and achieving long-term success.

5. Strategic Advantage Over Rivals

By dominating key recruiting regions, you can limit the talent pool available to your rivals, weakening their programs while strengthening your own.

The Mechanics of Recruiting Pipelines in College Football 25

Recruiting pipelines are essential components of the recruiting landscape in College Football 25, influencing how effectively programs can attract and secure talent. Understanding the mechanics of these pipelines can significantly enhance a program’s recruiting strategy.

Pipeline Ratings

1. Static Pipeline Ratings: Each college football program begins with a set of predetermined pipeline ratings based on historical data from the last ten years of recruiting. These ratings indicate the strength of a program’s connections to specific states or regions. Importantly, these ratings do not change throughout the Dynasty mode, meaning that a program’s initial pipeline strength remains constant regardless of its performance or recruiting success.

2. Pipeline Tiers: The pipeline ratings are categorized into six tiers: zero to five, where zero indicates no pipeline influence and five represents a strong connection. Each tier reflects the program’s ability to recruit effectively from that area. For example, a program with a four-tier pipeline in Georgia will have a significant advantage over one with a one-tier pipeline when competing for recruits from that state.

The Role of Coaches and Pipelines

1. Coach Selection: When hiring a head coach, the choice of pipelines does not influence the existing ratings. Instead, the coach’s abilities can enhance the effectiveness of the pipelines. The primary pipeline a coach has provided a boost in recruiting efforts, but this boost is not visually represented in the game mechanics.

2. Upgrading Pipelines: The only way to upgrade pipeline ratings is through the coach’s abilities, which can be developed in the CEO and team builder sections. Upgrading pipelines requires significant achievements, such as signing top recruiting classes, making it a challenging task for programs that are not already established.

You can view the ratings of coaches when you choose them in this article: College Football 25: Coach Archetypes Tier List

How to Building and Maintaining a Recruiting Pipeline?

Building and maintaining a recruiting pipeline in Dynasty College Football 25 requires a strategic approach that focuses on consistency, geographic targeting, and leveraging your program’s success. Here’s a breakdown of the steps involved:

Building a Recruiting Pipeline

1. Geographic Focus

Identify Key Regions: Start by determining which regions produce the most top-tier talent. States like California, Texas, and Florida are hotbeds for high-quality recruits. These areas should be your primary focus when building your recruiting pipeline.

Target High-Yield Areas: Concentrate your efforts on states that consistently produce multiple top recruits. This focus will help you establish a presence and build a reputation in those areas.

2. Consistent Recruitment

Recruit Regularly from Key Regions: Make it a priority to sign at least a few players from your target regions every season. The more players you recruit from a specific area, the stronger your pipeline becomes.

Balance Pipeline Growth with Team Needs: While it’s essential to build your pipeline, ensure that you’re also addressing immediate team needs. This balance will help you maintain a competitive team while growing your pipeline.

3. Leverage Program Success

Win Games: Success on the field enhances your program’s attractiveness to recruits, especially in regions where you’re trying to build a pipeline. The more you win, the more recruits from those areas will want to join your program.

Increase National Visibility: Participate in high-profile games, such as bowl games or national championships. These games boost your school’s visibility and make it easier to attract recruits from all over the country, including your target pipeline areas.

Maintaining a Recruiting Pipeline

1. Continuous Recruitment

Sign Players Every Year: To maintain a strong pipeline, ensure that you’re signing recruits from your established regions every season. This ongoing effort will keep your pipeline strong and ensure a steady flow of talent.

Monitor Pipeline Strength: Use the in-game tools to keep an eye on the strength of your pipelines. If you notice a region weakening, increase your recruiting efforts in that area.

2. Expand and Diversify

Consider Expanding to New Regions: Once you’ve established strong pipelines in key areas, consider expanding to new regions to tap into additional talent pools. This diversification can help you build a more robust and well-rounded team.

Balance Expansion with Maintenance: While expanding to new regions, don’t neglect your established pipelines. Ensure that you’re still signing players from your core regions to maintain the strength of those pipelines.

3. Adapt to Changes

Adjust to Shifting Talent Pools: Over time, the quality of recruits from certain regions may change. Be ready to shift your focus if a traditionally strong region starts producing less talent. Conversely, be quick to capitalize on emerging areas that begin producing top recruits.

React to Rivals’ Moves: If a rival school starts dominating one of your pipeline regions, consider stepping up your efforts there or focusing on strengthening your presence in other areas where you have a competitive advantage.

Building and maintaining a recruiting pipeline in Dynasty College Football requires strategic planning, relationship management, and ongoing evaluation. By focusing on key regions, establishing strong connections, and continuously engaging with prospects, programs can create a robust pipeline that leads to sustained success in the field. Prioritizing these efforts will ensure that your program remains competitive in the ever-evolving landscape of college football recruiting.

Tips for Recruiting Pipelines

Recruiting Pipelines is essential for building a successful program in Dynasty College Football. Here are key strategies to enhance your recruiting efforts and maximize your chances of securing top talent.

1. Understand and Utilize Recruiting Pipelines

Identify Strong Pipelines: Focus on states or regions where your program has established pipelines. These areas will yield better recruitment outcomes due to existing relationships with high school coaches and players.

Leverage Pipeline Ratings: Recognize the significance of pipeline ratings, which range from zero to five. Higher ratings indicate stronger connections, allowing your program to attract recruits more effectively.

Monitor Pipeline Performance: Regularly assess how well your pipelines are performing in terms of attracting talent. If certain pipelines are underperforming, consider shifting your focus to more fruitful regions.

2. Build Relationships with High School Coaches

Engagement: Establish and maintain strong relationships with high school coaches in your pipeline regions. Regular communication, attending games, and participating in local events can foster trust and collaboration.

Offer Support: Provide support to high school programs, such as attending their events or offering resources. This can enhance your program’s reputation and increase your visibility among potential recruits.

3. Target the Right Recruits

Focus on Fit: Prioritize recruits who fit your program’s needs and culture. Assess their skills, attributes, and potential to contribute to your team.

Consider Pipeline Influence: When evaluating recruits, consider the strength of your pipeline connections. Competing against programs with stronger pipelines for the same recruits can be challenging, so be strategic in your targeting.

Evaluate Interest Levels: Pay attention to recruits’ starting interest levels in your program. Higher interest often correlates with better chances of securing commitments.

4. Utilize Coach Abilities

Invest in Coaching Skills: Enhance your head coach’s abilities that improve pipeline effectiveness. While you cannot change pipeline ratings, upgrading coaching skills can lead to better recruitment outcomes.

Maximize Recruitment Hours: Use your coach’s abilities to maximize the number of hours spent on recruitment. More hours can lead to increased influence over recruits, especially when competing against larger programs.

5. Be Strategic with Offers and Visits

Early Offers: Offer scholarships to promising recruits early in the recruitment process. This can create a sense of urgency and demonstrate your program’s interest.

Plan Visits Wisely: Schedule visits for recruits who show interest in your program. A well-planned visit can significantly impact a recruit’s decision-making process.

6. Adapt and Evolve Your Strategy

Monitor Competitors: Keep an eye on other programs’ recruiting strategies and adjust your approach accordingly.     Understanding how competitors are recruiting can help you identify gaps and opportunities.

Evaluate and Adapt: Continuously evaluate your recruiting strategy based on performance data. If certain methods are not yielding results, be willing to adapt and try new approaches.

Path of Exile: The Laziest Way to Get Hundreds of Divines

In Path of Exile, farming Divine Orbs, one of the game’s most valuable currencies can be achieved through various methods that range from active farming to more passive or “lazy” approaches. Here are some of the laziest ways to accumulate hundreds of Divine Orbs:

1. Passive Income via Trading and Flipping

    Bulk Trading: Buy items in bulk when they are cheap and sell them in bulk when the price increases. This can include currency items, maps, or commonly used crafting materials.

    Flipping: Purchase undervalued items or currency from other players and sell them at a higher price. This requires keeping an eye on market trends and utilizing trade websites to find good deals.

2. Crafting and Selling High-Demand Items

    Essence Crafting: Use essences to craft desirable items. Certain essences can guarantee specific mods that are highly sought after. For example, using Screaming Essence of Greed on jewelry for guaranteed life rolls.

    Harvest Crafting: Utilize the Harvest crafting system to add, remove, or reforge items to create valuable gear. Harvest crafts can significantly enhance items, making them more appealing to buyers.

3. Divination Cards

    Farming Specific Cards: Some divination cards can be turned in for Divine Orbs or high-value items. Focus on farming areas where these cards drop frequently.

        The Scout: This card can be turned in for 10 Divine Orbs. It drops in specific maps and zones.

        The Hoarder: This card can be traded for an Exalted Orb, which can often be traded up to Divine Orbs depending on the market.

    Buying and Selling Cards: Purchase complete sets of divination cards for high-value items or currency and sell the resulting items or currency.

4. Passive Farming with the Atlas Passive Tree

    Sextant Strategy: Utilize sextants on your Watchstones to add valuable map modifiers that can increase the drops of Divination Cards and other valuable loot.

    Blight Maps: Run Blighted Maps and sell the oils and anointments. These maps can be run passively with proper tower placement.

    Delirium Farming: Engage in Delirium mirror maps with high loot multipliers, which can drop a significant amount of valuable items passively.

5. Labyrinth Farming

    Uber Labyrinth: Farm the Uber Labyrinth for enchants, which can be sold for a high price if you get desirable ones on popular helmet bases.

6. Selling Services

    Boss Carries: Offer boss-killing services for a fee. Many players are willing to pay in Divine Orbs for quick and efficient carries through challenging bosses.

    Crafting Services: Provide crafting services if you have access to specific high-tier crafting benches or know how to craft sought-after mods on gear.

7. Utilizing League Mechanics

    Heist: Run Heist missions to collect currency and valuable contracts and blueprints. Selling these can net a significant amount of Divine Orbs.

    Expedition: Engage in Expedition content and sell the artifacts or specific logbooks, especially those from Tujen, who exchange for a lot of currency.

By combining these passive methods with regular play, you can steadily accumulate a substantial number of Divine Orbs without intense grinding. Keeping an eye on market trends and player demand will also help maximize your profits in Path of Exile. For further details and advanced strategies, resources like MMOexp can provide up-to-date advice and insights. Stay tuned to MMOexp.com to purchase Path of Exile currency and Path of Exile items, and take on new challenges in Path of Exile.

Open post

Elden Ring DLC: Three Amulets for Enhanced Builds

With the release of the anticipated Elden Ring DLC, players are diving deeper into the game rich mechanics and exploring new builds to maximize their effectiveness in battle. One of the most intriguing aspects of character customization in Elden Ring is the use of amulets. We’ll explore a powerful build that utilizes three specific amulets to enhance damage output, survivability, and attack speed. Let’s break down these amulets and how they synergize to create a formidable playstyle.

Fragment of Alexandria

The first amulet we’ll discuss is the Fragment of Alexandria. This amulet is a staple for players looking to boost their skill damage. With a 15% increase in skill damage, it serves as a solid foundation for any build focused on dealing heavy damage.Beyond its damage-enhancing capabilities, the Fragment of Alexandria also encourages players to experiment with various skills and weapon arts. It opens up opportunities to mix and match different weapons and skills, allowing for a personalized combat style. Whether you’re using a swift katana or a heavy greataxe, this amulet enhances your ability to deal significant damage while maintaining versatility.

Rapture of the Blood Lord

Next up is the Rapture of the Blood Lord, an amulet designed for players who want to capitalize on bleed effects. In this build, the Rapture of the Blood Lord is crucial for dealing fast and frequent bleed damage, which can quickly overwhelm opponents. When activated, this amulet greatly increases the likelihood of inflicting bleed status on enemies, making it easier to knock them down and finish the fight.

The synergy between the Rapture of the Blood Lord and the Fragment of Alexandria is noteworthy. As you deal damage and trigger bleed effects, the combination of enhanced skill damage and bleed procs allows for rapid health depletion, often catching enemies off guard. This amulet is especially effective in PvP scenarios, where quick engagements can turn the tide of battle. If you find yourself facing tougher foes who resist bleed, you can easily swap out this amulet for defensive options.

Defensive Options: Dragoncrest Greatshield Amulet and Two-Headed Turtle Amulet

In cases where your enemies are resistant to bleed, it’s wise to consider defensive alternatives. The Dragoncrest Greatshield Amulet and the Two-Headed Turtle Amulet serve as excellent substitutes depending on your needs.

The Dragoncrest Greatshield Amulet provides enhanced damage negation, making it a fantastic choice for tankier builds. If you find yourself in a situation where taking hits is inevitable, this amulet will help you survive longer against powerful foes.

On the other hand, if your gameplay style leans more towards agility and quick strikes, the Two-Headed Turtle Amulet can be a game-changer. This amulet increases stamina regeneration, allowing you to execute rapid attacks without the fear of running out of stamina. This is particularly important for builds focused on fast, multi-hit attacks, as it ensures you can maintain pressure on your enemies without interruption.

Millicent Prosthetic and Winged Sword Emblem of the Decayed

For the third and final slot in this build, we focus on maximizing our damage output through fast, multi-hit attacks. Here, we recommend integrating Millicent Prosthetic and the Winged Sword Emblem of the Decayed. Both of these amulets are tailored for builds that prioritize speed and agility.

Millicent Prosthetic enhances your attack speed and increases the damage of your rapid strikes. This effect is particularly potent when combined with the bleed effects from the Rapture of the Blood Lord, allowing you to stack damage quickly and efficiently. You’ll find that your enemies often struggle to respond to the onslaught of swift attacks, making it easier to secure victories.

The Winged Sword Emblem of the Decayed complements this approach by further boosting your attack power during multi-hit sequences. The combination of these two amulets creates a perfect storm, allowing you to unleash a flurry of strikes that can decimate opponents before they even have a chance to react.

In conclusion, the three amulets featured in this build—Fragment of Alexandria, Rapture of the Blood Lord, and either the Dragoncrest Greatshield Amulet or the Two-Headed Turtle Amulet—create a well-rounded strategy that emphasizes both damage output and survivability. With the addition of Millicent Prosthetic and the Winged Sword Emblem of the Decayed, you’ll be equipped to dominate both PvE and PvP scenarios.

As you explore the Elden Ring DLC, don’t hesitate to experiment with these Elden Ring Runes and buy Elden Ring Items in MMoexp to find the right combination for your play style. The charm of Elden Ring lies in its depth and flexibility, and with the right setup you can carve your name into the annals of the Lands Between.

The Best Value for All Attributes in NBA 2K25

If you’re looking to build the most efficient player in NBA 2K25, knowing which attributes to prioritize can make all the difference. This guide will walk you through the best value for each attribute, ensuring you maximize your player’s potential across positions, whether you’re a guard, forward, or center.

Why Attribute Efficiency Matters

Choosing the right attributes for your build isn’t just about maximizing one area—it’s about balancing your stats to create a versatile, well-rounded player. Focusing on the most valuable thresholds for NBA 2K MT attributes gives you access to crucial badges and animations that can elevate your gameplay.

Best Values for Key Attributes in NBA 2K25

Whether you’re crafting a point guard, shooting guard, small forward, or center, you need to be strategic with your attribute points. Here’s a breakdown of the best value for each key category.

1. Close Shot

– For Big Men: Set your Close Shot at 84 to unlock the Silver Paint Prodigy badge. This ensures you’re more effective in the paint, especially on missed layups or dunks. Push it to 86 to unlock the Gold Float Game, adding versatility to your close-range shots.

– For Guards: Minimize Close Shot unless you’re focusing on floaters. 80 Driving Layup grants access to the Trey Young floater, a quick and effective move for finishing near the basket.

2. Driving Dunk

– For Occasional Dunkers: A 55 Driving Dunk unlocks Klay Thompson and CJ McCollum packages. If dunking isn’t your primary focus, this is sufficient.

– For Regular Dunkers80 Driving Dunk unlocks the Devin Booker Dunk Package, the safest and most reliable dunk in the game. This value also grants Gold Area Wizard, making it ideal for consistent finishers.

– For Contact Dunkers: Set your Driving Dunk to 87 for contact dunks. Ensure your Vertical is at least 75 for optimal dunking potential. If you’re seeking maximum posterization opportunities, push to 89 to unlock additional dunk packages.

3. Mid-Range Shot

– A 78 Mid-Range unlocks Silver Set Shot Specialist, a critical badge for stationary shooting. This badge is essential whether you’re a spot-up shooter or taking mid-range pull-ups.

– For more consistent performance, aim for 89 Mid-Range, unlocking Gold Set Shot Specialist for Cheap NBA 2K25 MT increased accuracy on standing shots.

4. Three-Point Shot

– For Consistent Shooters: A 78 Three-Point Shot gives you Silver Set Shot Specialist, crucial for improving your shooting percentage. For a slight upgrade, push to 83, which also unlocks Bronze Limitless Range, extending your shooting range.

– For Sharpshooters: Increase to 89 to unlock Silver Limitless Range and Gold Set Shot Specialist. This is the sweet spot for most players who want to be effective from beyond the arc without overspending on attributes.

5. Ball Handling

– Basic Ball Handling: An 81 Ball Handle unlocks Silver Handles for Days, allowing you to maintain stamina while dribbling. For most builds, this is a key threshold for efficient dribbling.

– Advanced Ball Handling88 Ball Handle gives you access to Kobe Bryant’s signature animations, adding extra creativity to your dribble moves.

6. Speed with Ball

– For Big Guards: A 75 Speed with Ball unlocks Zach LaVine’s dribble style and the Silver Lightning Launch, giving you enough speed to drive past defenders.

– For Elite Guards: Small guards should aim for 91 Speed with Ball, unlocking Hall of Fame Lightning Launch, the highest level of speed available in the game.

7. Perimeter Defense

– For Guards: Set Perimeter Defense to 83 to unlock Silver Pick Dodger and Challenger badges, which help defend against pick-and-rolls and contest shots. If you want to be more competitive on defense, 92 Perimeter Defense unlocks Gold Challenger and other key defensive badges.

8. Rebounding

– For Big Men92 Defensive Rebound unlocks Gold Rebound Chaser, ensuring you dominate on the boards.

– For Offensive Players80 Offensive Rebound is a good balance, providing enough ability to grab offensive boards without sacrificing other attributes.

9. Strength and Vertical

– Strength: For players who want to dominate physically, aim for 91 Strength to unlock Gold Brick Wall and Gold Post Powerhouse, which makes you more effective at setting screens and fighting for position.

– Vertical: Dunkers should have at least 75 Vertical to unlock contact dunks. If you’re building a center or forward, consider increasing it to 80 to improve your rebounding and blocking ability.

Understanding the best value for your attributes in NBA 2K25 is critical to building a versatile player. Rather than maxing out every stat, focus on hitting the right thresholds to unlock essential badges and animations that will make you more effective on the court.

FAQs

Q: What is the best driving dunk value for contact dunks in NBA 2K25?

A: For contact dunks, aim for 87 Driving Dunk with a 75 Vertical. This ensures you unlock contact dunk packages that will enhance your finishing at the rim.

Q: How important is the mid-range shot in NBA 2K25?

A: The mid-range shot is valuable for players who take stationary or fading jumpers. A 78 Mid-Range unlocks Silver Set Shot Specialist, making your shots more consistent.

Q: Should I invest heavily in ball handling for my build?

A: 81 Ball Handle is a great value for most players, providing Silver Handles for Days, which allows for more efficient dribbling without exhausting stamina.

Posts navigation

1 2 3 8 9 10 11 12 13 14 19 20 21
Scroll to top